Web Design
Drupal 8: Creating Custom Theme
Attracting consumers or users is the most basic requirement to win over competitors, and in this modern world which technology is developing rapidly together with the website design trend, the UI (User Interface) is one of section that needs to be planned and worked on. The bright side of this rapid growth many designs now are free and open-source which are reusable and easy to use, but if you want to have your own design and have some personal accents you could create your own design; one of your option would be Drupal, a CMS platform which is flexible, secured and have a robust performance. The great thing about Drupal is that it has many contributors which makes things easier and many sources such as modules and even some awesome website designs and themes! The best part when it becomes to themes is that we could create our own and do everything what we want, and without further ado here are some steps in creating your own theme:
Step 1:
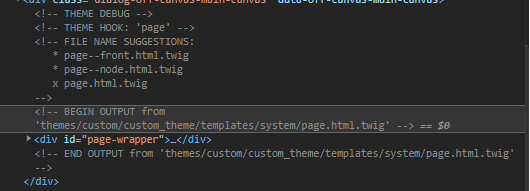
The first thing to do is to enable the twig debugging so that you won’t be confused which files should be updated and created. This will show suggestions when you inspect the element in developers tool like this:
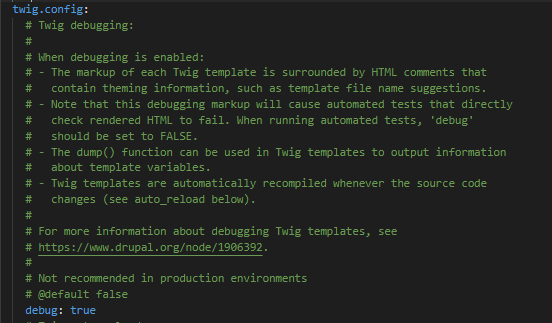
Go to “/sites/default/services.yml” (if you can’t find the services.yml you could copy the “default.services.yml” and rename it to “services.yml”).
Then find the “twig.config” and set the “debug:false” to “debug:true”.
Step 2:
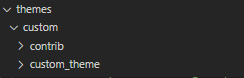
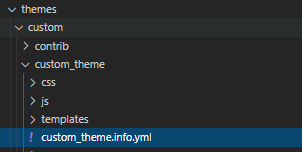
Create a custom theme under ‘web/themes/custom’ folder and will name the folder as “custom_theme”.
Step 3:
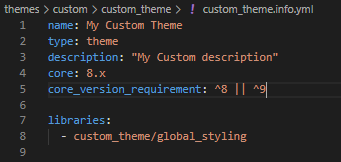
Next, we will need to create an “info.yml“ file. We need to specify the basic keys for it. And let us put it inside the “custom_theme” folder.
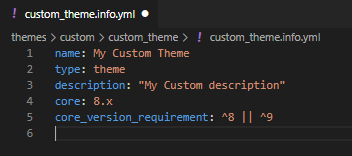
Note: “core_version_requirement” is the mapping for which drupal version the theme would run.
Step 4:
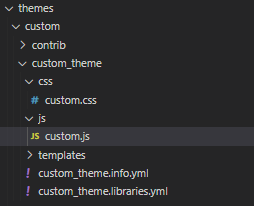
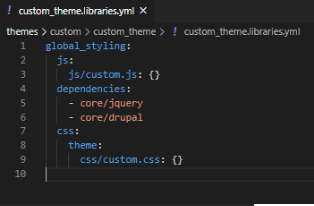
Let’s create a “libraries.yml” file to specify all the libraries we need (CSS AND JS) for our custom Drupal 8 theme. We will also create CSS and JS directory and its files to link it in here. We are going to name the library as global-styling.
Step 5:
After creating the libraries.yml file, we need to link it to our theme. For this, we are going to add it in the info.yml file which will then apply it to the whole theme.
Step 6:
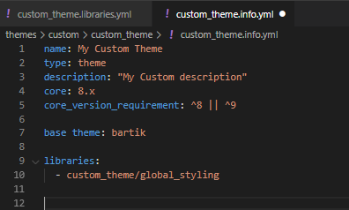
Next, we need to inherit the ‘Base Theme’.In our case, we will inherit the ‘bartik’ theme which is a Drupal core theme. So, the key will be the base theme in info.yml.
Step 7:
We will define the‘regions’ for our theme. In info.yml, we have to define it under the ‘regions’ key.
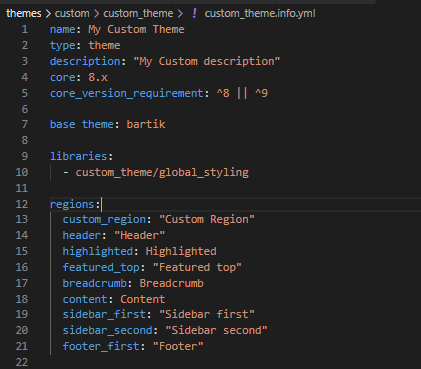
Under ‘regions’ key, you can define your regions for the custom Drupal theme. In this sample,
custom_region: Is the id of the region which should be lowercase letters.
Custom Region: Is the name of the region which can be in any case.
Step 8:
After we have defined our regions for our custom Drupal theme, we need to override “page.html.twig” to grab our ‘regions’ instead of the bartik theme’s (To see the default page.html.twig we could go to the browser and see the file suggestions and trace the bartik default file ). We will create templates/system directory under which we will create the page.html.twig.
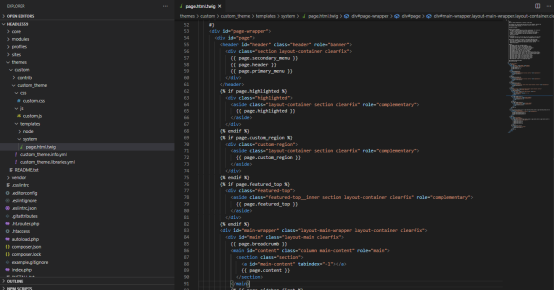
In page.html.twig, we will create the HTML structure for our regions. As you see in {{ page.custom_region}} – Here,
page - Is the key to render ‘regions’ in the page
Custom_region- Is the region which we have defined in info.yml file.
So now, we have created our regions and rendered it on the page.
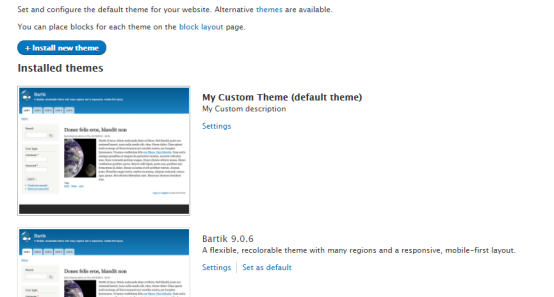
Step 9:
Go to Appearance in your Drupal site. You can see your custom Drupal theme present in the Uninstalled themes. You just have to install it and there you have it, You have created a custom theme for you Drupal website. You can now add or customize the look and feels of your own website.