

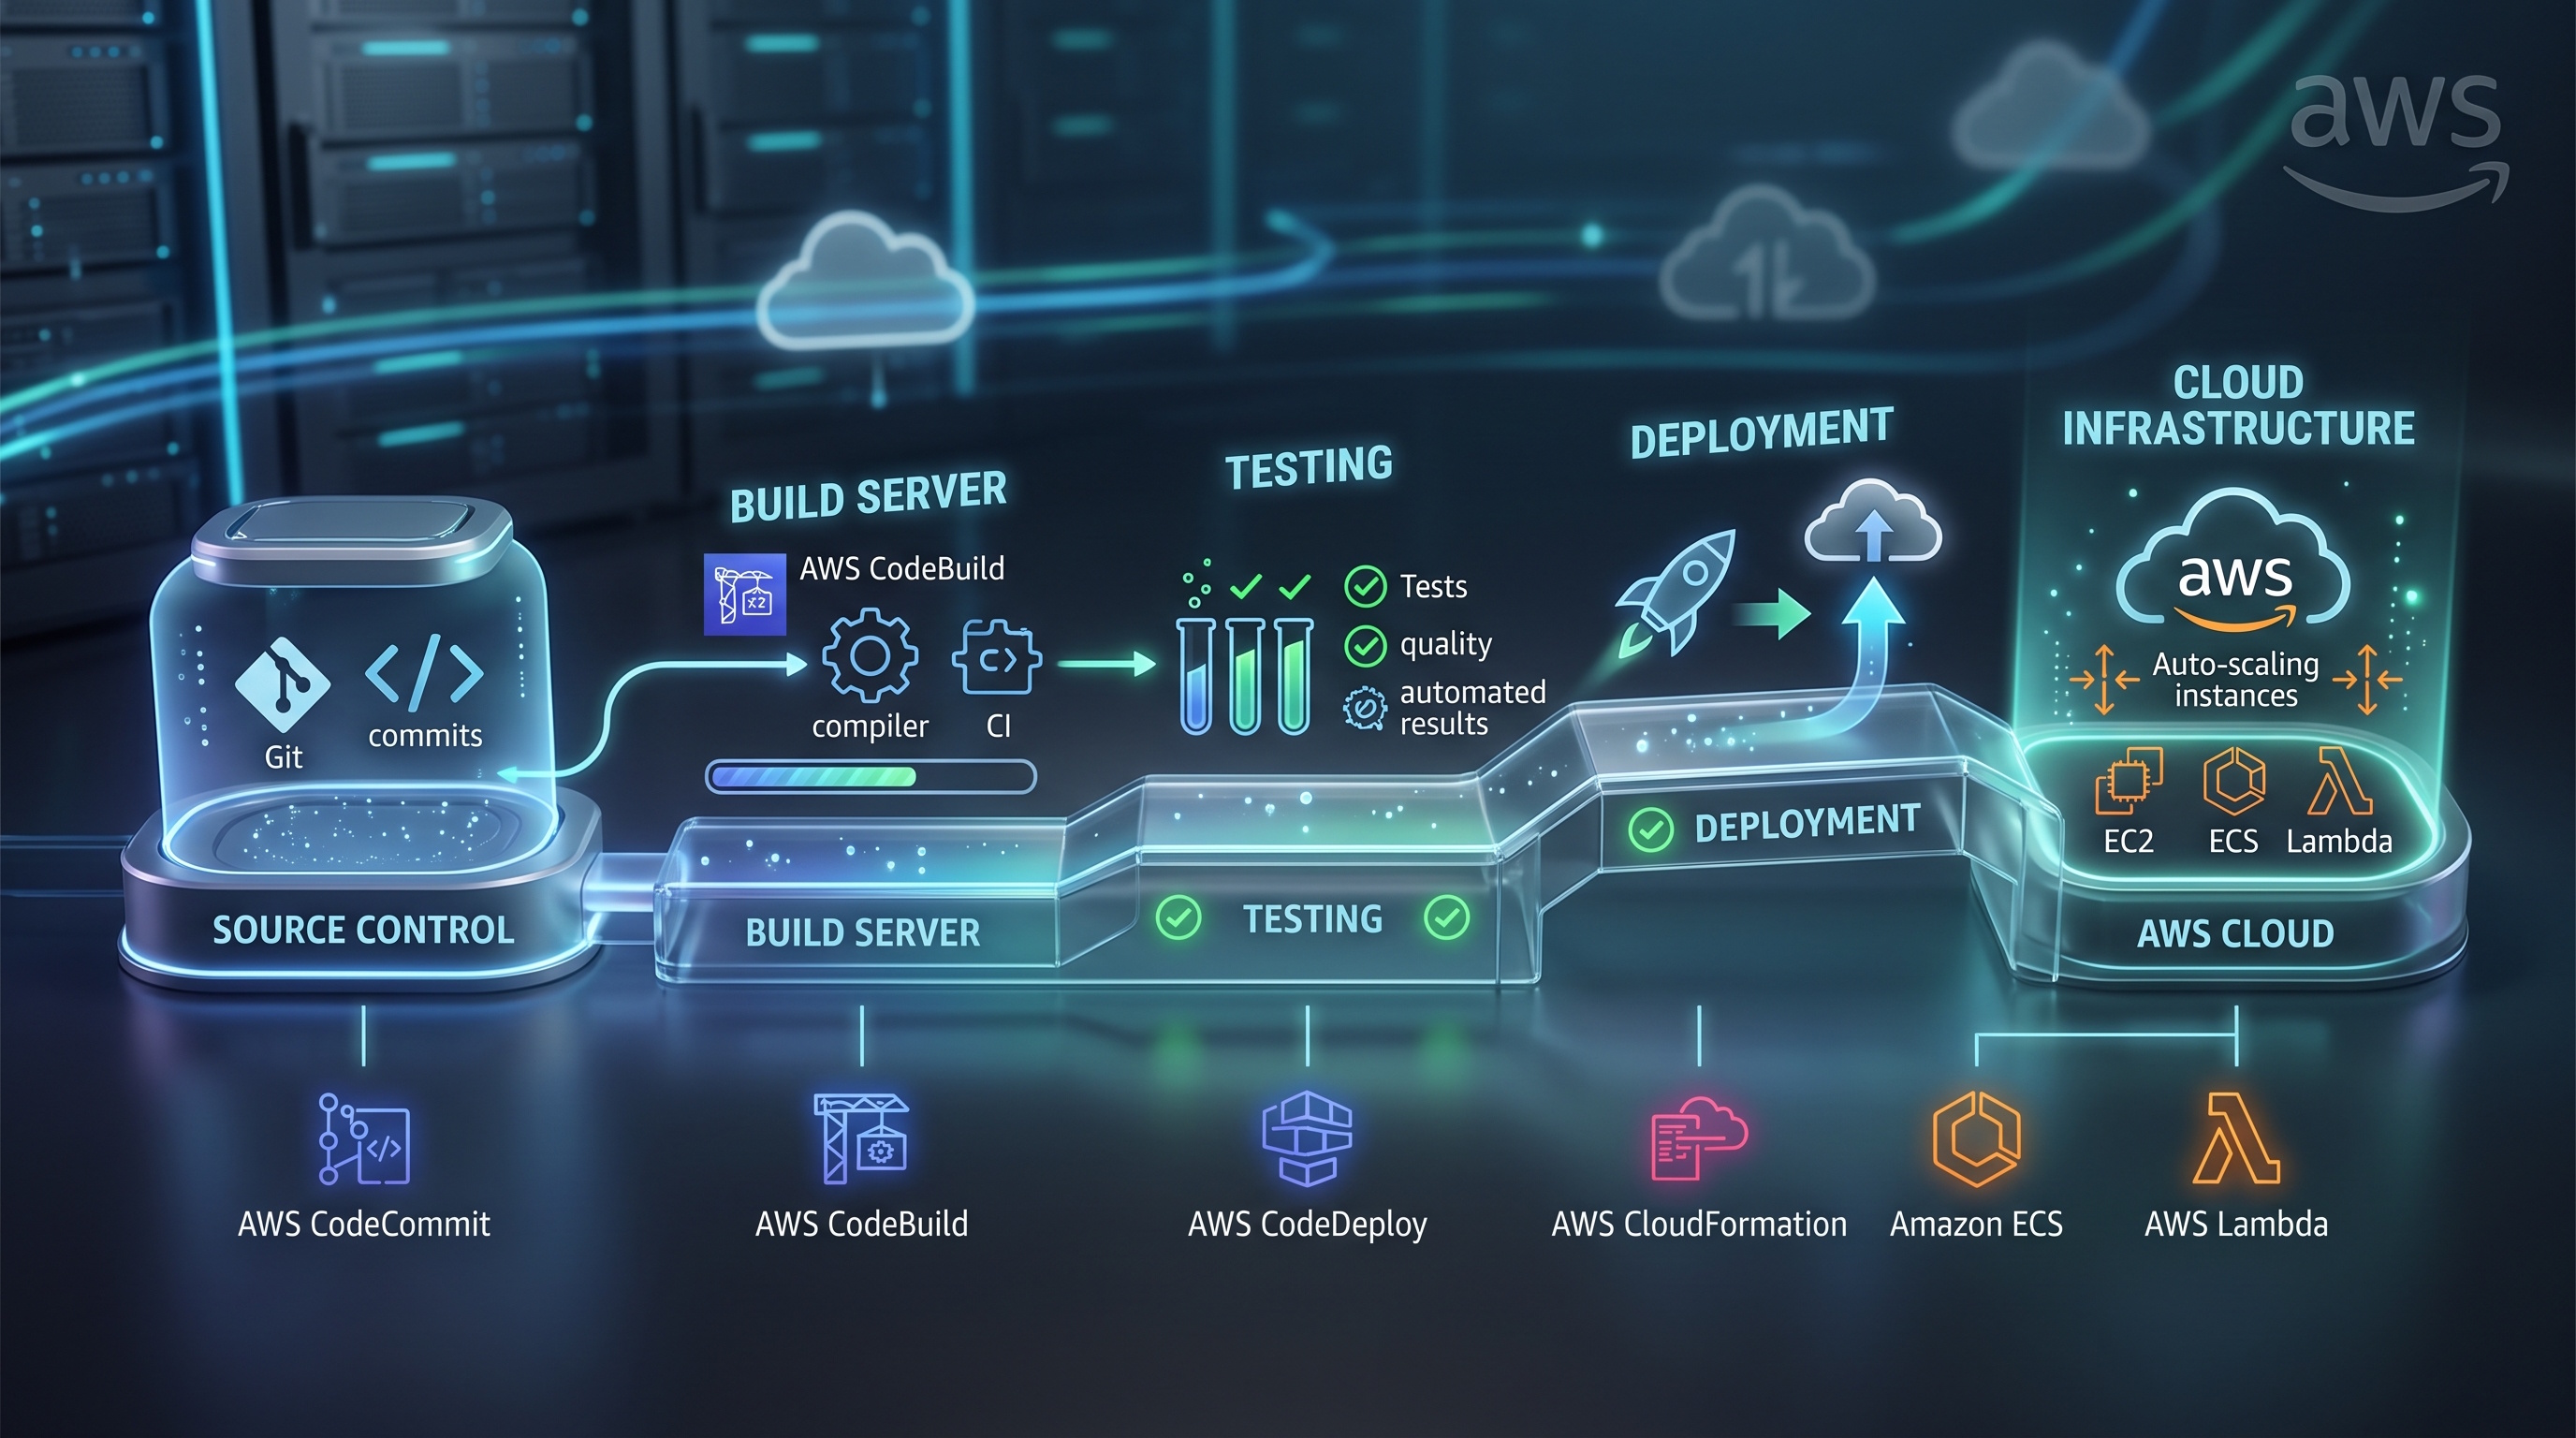
Building a CI/CD workflow with AWS CodePipeline and CodeBuild gives software teams a straightforward way to automate releases. By keeping stages focused, locking down IAM access, and monitoring pipeline health, you can ship code quickly without sacrificing stability or taking on heavy infrastructure management.
Introduction
Continuous integration and continuous delivery (CI/CD) are practical standard requirements for modern software development. They help teams ship updates faster, eliminate manual errors, and keep code quality consistent across environments. AWS provides two core tools to handle this pipeline workflow: CodePipeline and CodeBuild. This guide covers how to design, set up, and run a reliable CI/CD setup using both tools in production.
Understanding the CI/CD Landscape
What is CI/CD?
- Continuous Integration: Developers merge code into a shared branch regularly. Automated builds and test suites run on every commit to catch bugs early.
- Continuous Delivery: Tested code automatically gets prepped for release to target environments. Final deployment usually waits for a manual sign-off.
- Continuous Deployment: Changes that pass all automated test suites deploy straight to production without human intervention.
Why Choose AWS for CI/CD?
- Scalability: Build servers scale automatically based on incoming job volume.
- Security: Built-in integrations with IAM, KMS, and Secrets Manager keep keys and deployment artifacts safe.
- Pay-as-you-go: You only pay for active build minutes and actual pipeline runs.
- Integration: Connects directly into S3, ECR, Lambda, CloudFormation, and other AWS resources.
Overview of CodePipeline
CodePipeline orchestrates the path your code takes from repository to production. It organizes tasks into distinct stages where actions handle specific jobs like pulling source code, building binaries, testing, and deploying.
Core Concepts
- Pipeline: The main configuration that lays out your workflow stages in order.
- Stage: A logical step in the pipeline that groups related actions together.
- Action: The actual task being run, such as grabbing source code from CodeCommit, compiling with CodeBuild, or updating resources via CloudFormation.
- Artifact: Files created by one action that pass along as inputs to the next action.
Typical Stage Layout
1. Source: Pulls the latest code from your version control system.
2. Build: Compiles the code and runs unit tests.
3. Test: Runs integration tests or vulnerability scans.
4. Deploy: Ships the verified artifact out to your target environment.
Overview of CodeBuild
CodeBuild handles compilation, testing, and artifact creation without requiring you to manage or scale actual build servers.
Key Features
- Managed Build Environments: Pick a preconfigured environment image like Ubuntu or Amazon Linux, or bring your own Docker image.
- Parallel Builds: Run concurrent build jobs to keep pipeline wait times low.
- Environment Variables: Pass configuration settings and credentials into builds safely.
- Logs and Metrics: Streams build output directly to CloudWatch for logging and monitoring.
Designing a Production-Ready Pipeline
Step 1: Define the Source Repository
- Host your code in AWS CodeCommit or hook up third-party hosts like GitHub or Bitbucket.
- Set up branch protection rules to require pull request approvals before code reaches main branches.
Step 2: Create a Build Project in CodeBuild
- Project Name: Use a clear naming convention, like `myapp-build`.
- Source Provider: Select the repository provider matching your pipeline source.
- Environment Image: Pick a managed runtime that fits your stack, or use a custom image stored in Amazon ECR.
- Buildspec File: Include a `buildspec.yml` file in your repository root to lay out build phases (install, pre_build, build, post_build) and output artifacts.
- Cache Settings: Enable caching for dependencies so repeated builds execute faster.
- Service Role: Configure permissions so the project can pull source files, store artifacts in S3, and stream logs to CloudWatch.
Step 3: Assemble the Pipeline in CodePipeline
1. Create a New Pipeline: Choose a clear name that reflects your app and environment, such as `myapp-prod-pipeline`.
2. Add a Source Stage: Connect your code repository, select the main branch, and turn on change detection through Amazon EventBridge.
3. Add a Build Stage: Link the CodeBuild project you configured. Pass the source artifacts into the build step.
4. Add a Test Stage (Optional): Add an extra build action to run integration tests, security checks, or static analysis.
5. Add a Deploy Stage: Choose a deployment provider for your target setup, such as CloudFormation for infrastructure, Elastic Beanstalk for web apps, or ECS for containers.
6. Configure Approvals: Add manual approval stops before production deployments if your process requires sign-offs.
Step 4: Secure the Pipeline
- IAM Least Privilege: Assign separate service roles for each step, limiting permissions strictly to required resources.
- Encryption: Store build artifacts in S3 with server-side encryption enabled. Use KMS keys to encrypt sensitive environment variables.
- Audit Trails: Enable AWS CloudTrail logging to record pipeline actions and maintain a history of changes.
Best Practices for Reliability and Performance
- Use Immutable Artifacts: Tag build outputs with unique identifiers, like commit SHA hashes, so releases never overwrite each other.
- Parallelize Independent Actions: Run independent test steps side-by-side in the same stage to shorten total runtimes.
- Implement Rollback Strategies: Use CloudFormation change sets or ECS task definitions that roll back automatically if a deployment fails.
- Monitor Build Duration: Set up CloudWatch alarms for build durations to spot performance slowdowns caused by bloated dependencies.
- Leverage Spot Instances: Configure CodeBuild to use spot instances where appropriate to lower costs while keeping on-demand fallback options ready.
Monitoring, Logging, and Troubleshooting
- CloudWatch Logs: Every CodeBuild execution sends output directly to a log group, making it easy to search for compiler errors or test failures.
- Pipeline Execution History: CodePipeline tracks every run visually, showing you exactly where a pipeline succeeded or stalled.
- EventBridge Rules: Trigger team notifications in Slack or email via SNS when pipeline status updates occur.
- Health Checks: Add post-deployment health checks so the pipeline confirms the new application version responds properly before finishing the run.
Scaling the CI/CD System
- Multiple Pipelines per Application: Build separate pipelines for development, staging, and production so changes remain isolated.
- Cross-Account Pipelines: Use IAM roles or AWS Resource Access Manager to deploy builds safely across different AWS accounts.
- Reusable Buildspec Templates: Keep common build steps in a shared repo so multiple projects stay consistent.
Conclusion
Building a CI/CD workflow with AWS CodePipeline and CodeBuild gives software teams a straightforward way to automate releases. By keeping stages focused, locking down IAM access, and monitoring pipeline health, you can ship code quickly without sacrificing stability or taking on heavy infrastructure management.